0%

Hexo+GitHub+Markdown常用用法

记录一些Hexo+Markdown的常用语法~

Hexo

部署

新建博客

1
$ hexo n '博客名称'

上传

1
$ hexo g

hexo generate

1
$ hexo g -d

新建栏目

以“工具 Tools”栏目为例

1
$ hexo new page 'tool'

则会在/hexo/source/中新增tool文件夹,文件夹下有index.md文件,修改文件内容即可。

  • 修改栏目中文名称:在/hexo/themes/themeName/languages/zh-CN.yml中的menu下添加tool: 工具 Tools

npm

  • 安装、卸载插件
1
2
3
4
5
// 安装插件
npm install 插件名称

// 卸载插件
npm uninstall 插件名称

npm升级:

1
npm install -g npm

标题自动编号

代码

代码折叠

代码高亮

主题

Fluid主题

安装可见:Hexo-fluid

压缩包下载

NeXT主题

Fork me on GitHub

流程图

评论

搜索

SEO

友链

参考:

  1. 新建links页面:hexo new page links,则会在/source/下创建/source/links/index.md文件
  2. 在侧边栏添加“友链”标签页:
    1. 在站点_config.yml文件中添加:
    1
    2
    menu:
    links: /links || fa fa-link
    1. 修改标签页名称为中文:在文件hexo>theme>next>languages>zh-Hans.yml中添加:
    1
    2
    menu:
    links: 友链
  3. /links/index.md文件中添加内容:
1
2
3
4
5
6
7
8
---
title: 友链
type: links
---

<style>.links-content{margin-top:1rem}.link-navigation::after{content:" ";display:block;clear:both}.card{width:130px;font-size:1rem;padding:0;border-radius:4px;transition-duration:.15s;margin-bottom:1rem;display:block;float:left;box-shadow:0 2px 6px 0 rgba(0,0,0,.12);background:#f5f5f5}.card{margin-left:16px}@media(max-width:567px){.card{margin-left:16px;width:calc((100% - 16px)/2)}.card:nth-child(2n+1){margin-left:0}.card:not(:nth-child(2n+1)){margin-left:16px} }@media(min-width:567px){.card{margin-left:16px;width:calc((100% - 32px)/3)}.card:nth-child(3n+1){margin-left:0}.card:not(:nth-child(3n+1)){margin-left:16px} }@media(min-width:768px){.card{margin-left:16px;width:calc((100% - 48px)/4)}.card:nth-child(4n+1){margin-left:0}.card:not(:nth-child(4n+1)){margin-left:16px} }@media(min-width:1200px){.card{margin-left:16px;width:calc((100% - 64px)/5)}.card:nth-child(5n+1){margin-left:0}.card:not(:nth-child(5n+1)){margin-left:16px} }.card:hover{transform:scale(1.1);box-shadow:0 2px 6px 0 rgba(0,0,0,.12),0 0 6px 0 rgba(0,0,0,.04)}.card .thumb{width:100%;height:0;padding-bottom:100%;background-size:100% 100%!important}.posts-expand .post-body img{margin:0;padding:0;border:0}.card .card-header{display:block;text-align:center;padding:1rem .25rem;font-weight:500;color:#333;white-space:normal}.card .card-header a{font-style:normal;color:#2bbc8a;font-weight:700;text-decoration:none;border:0}.card .card-header a:hover{color:#d480aa;text-decoration:none;border:0}</style><div><div class="links-content"><div class="link-navigation" id="links1"></div></div></div>


Markdown

Font-matter区

Font-matter区即 两行---之间的内容

文章置顶

  • 在Font-matter区添加toc: truetoc: 数字

    • 数字越大越靠前,默认不设置则为0
    • 数值相同时按创建时间倒序排列
  • hexo个性化设置

文章摘要

若想要在博客首页只展示文章的摘要,在摘要与正文中间插入

1
<!--more-->

引用

居中引用

1
{% cq %}居中引用{% endcq %}

效果:

居中引用

永久链接

引用站内文章

1
{% post_link 站内文章对应的.md名称(不带后缀.md) %}

如:引用站内文章《Restart!》,对应的文件名是Restart.md

1
{% post_link Restart %}

引用文章内锚点

如:跳转到本文的##代码高亮小节代码高亮

1
[代码高亮](#代码高亮)
  • 如果描点名称中有空格或下划线_等字符串,应将其改为分隔符-

字体

1
<font face="字体" size="字号" color="颜色">这里是需要突出显示的内容</font>

图片

Markdown语法:

1
2
<meta name="referrer" content="no-referrer" />
{% asset_img inorder.png 中序遍历 %}

1
{% asset_img "span>" "title" %}

1
<img src="/asset/[your_image]" width="[width]" height="[height]" alt="[alternative_text]" title="[title]">
  • 在Mardown文件头部加入<meta name="referrer" content="no-referrer" />可解决图片不显示的问题
  • 头部是指--区域以后、正文之前

参考:

表格

1
2
3
4
5
6
7
8
9
10
11
12
13
14
15
16
17
18
19
20
21
22
23
24
25
26
27
28
29
30
31
32
33
34
35
36
37
38
39
40
41
42
43
44
45
<div>
<style scoped>
.dataframe tbody tr th:only-of-type {
vertical-align: middle;
}

.dataframe tbody tr th {
vertical-align: top;
}

.dataframe thead th {
text-align: center;
}
</style>
<table border="1" class="dataframe">
<thead>
<tr style="text-align: center;">
<th>标题行</th>
<th>第一列标题</th>
<th>第二列标题</th>
</tr>
</thead>
<tbody>
<tr>
<th>第一行</th>
<td>$a_{11}$</td>
<td>$a_{12}$</td>
</tr>
<tr>
<th rowspan="2">合并两行单元格</th>
<td>$a_{21}$</td>
<td>$a_{22}$</td>
</tr>
<tr>
<td>第三行就少一个单元格</td>
<td>$a_{32}$</td>
</tr>
<tr>
<th>第四行</th>
<td colspan="2">合并两列</td>
</tr>
<tr>
</tbody>
</table>
</div>

效果:

标题行 第一列标题 第二列标题
第一行 $a_{11}$ $a_{12}$
合并两行单元格 $a_{21}$ $a_{22}$
第三行就少一个单元格 $a_{32}$
第四行 合并两列

公式

  • 公式对齐
1
2
3
4
5
6
7
\begin{equation}
\begin{aligned}
第一行 &= 对齐符号为\& 然后两个斜杠换行\\
第二 &+ 左边有个对齐符 \\
三 &+ 第二三行的加号与第一行的等号对齐
\end{aligned}
\end{equation}

效果如下:
\begin{equation}
\begin{aligned}
第一行 &= 对齐符号为& 然后两个斜杠换行\
第二 &+ 左边有个对齐符 \
三 &+ 第二三行的加号与第一行的等号对齐
\end{aligned}
\end{equation}

Hexo 书写 LaTeX 公式时的一些问题及解决方法

其他

提示块

1
2
3
4
5
6
7
8
9
10
11
12
13
14
15
16
17
18
19
20
21
22
23
{% note default %}
default 提示块标签
{% endnote %}

{% note primary %}
primary 提示块标签
{% endnote %}

{% note success %}
success 提示块标签
{% endnote %}

{% note info %}
info 提示块标签
{% endnote %}

{% note warning %}
warning 提示块标签
{% endnote %}

{% note danger %}
danger 提示块标签
{% endnote %}

在主题配置文件_config.yml中修改配置:

1
2
3
4
5
6
7
8
9
10
11
12
13
# Note tag (bs-callout)
note:
# Note tag style values:
# - simple bs-callout old alert style. Default.
# - modern bs-callout new (v2-v3) alert style.
# - flat flat callout style with background, like on Mozilla or StackOverflow.
# - disabled disable all CSS styles import of note tag.
style: flat ## 风格
icons: false ## 要不要图标
border_radius: 3 ## 圆角矩形
# Offset lighter of background in % for modern and flat styles (modern: -12 | 12; flat: -18 | 6).
# Offset also applied to label tag variables. This option can work with disabled note tag.
light_bg_offset: 0

效果:

default 提示块标签

primary 提示块标签

success 提示块标签

info 提示块标签

warning 提示块标签

danger 提示块标签

1
2
3
{% note warning %}
定义
{% endnote %}

定义

1
2
3
{% note danger %}
算法
{% endnote %}

算法

1
2
3
{% note success %}
定理/性质
{% endnote %}

定理/性质

1
2
3
{% note default %}
证明 或 推荐 或 引用 或 示例
{% endnote %}

证明 或 推荐 或 引用 或 示例

图标icons

使用hexo-fontawesome插件实现在博客正文插入icons:

FontAwesome网站:https://fontawesome.com/icons

1
{% fa_inline iconName [prefix] %}
  • iconName:图标名称
  • prefix
    • fab对应fa-brands
    • fas对应fa-solid
1
2
3
4
5
6
7
# My
## Post
### Content
{% fa_inline twitter fab %}
#### Here

{% fa_css %}

最后一行不可缺少,否则图标会很大

Emoji

在Markdown中插入Emoji表情::watermelon:(以西瓜为例,效果如 🍉)
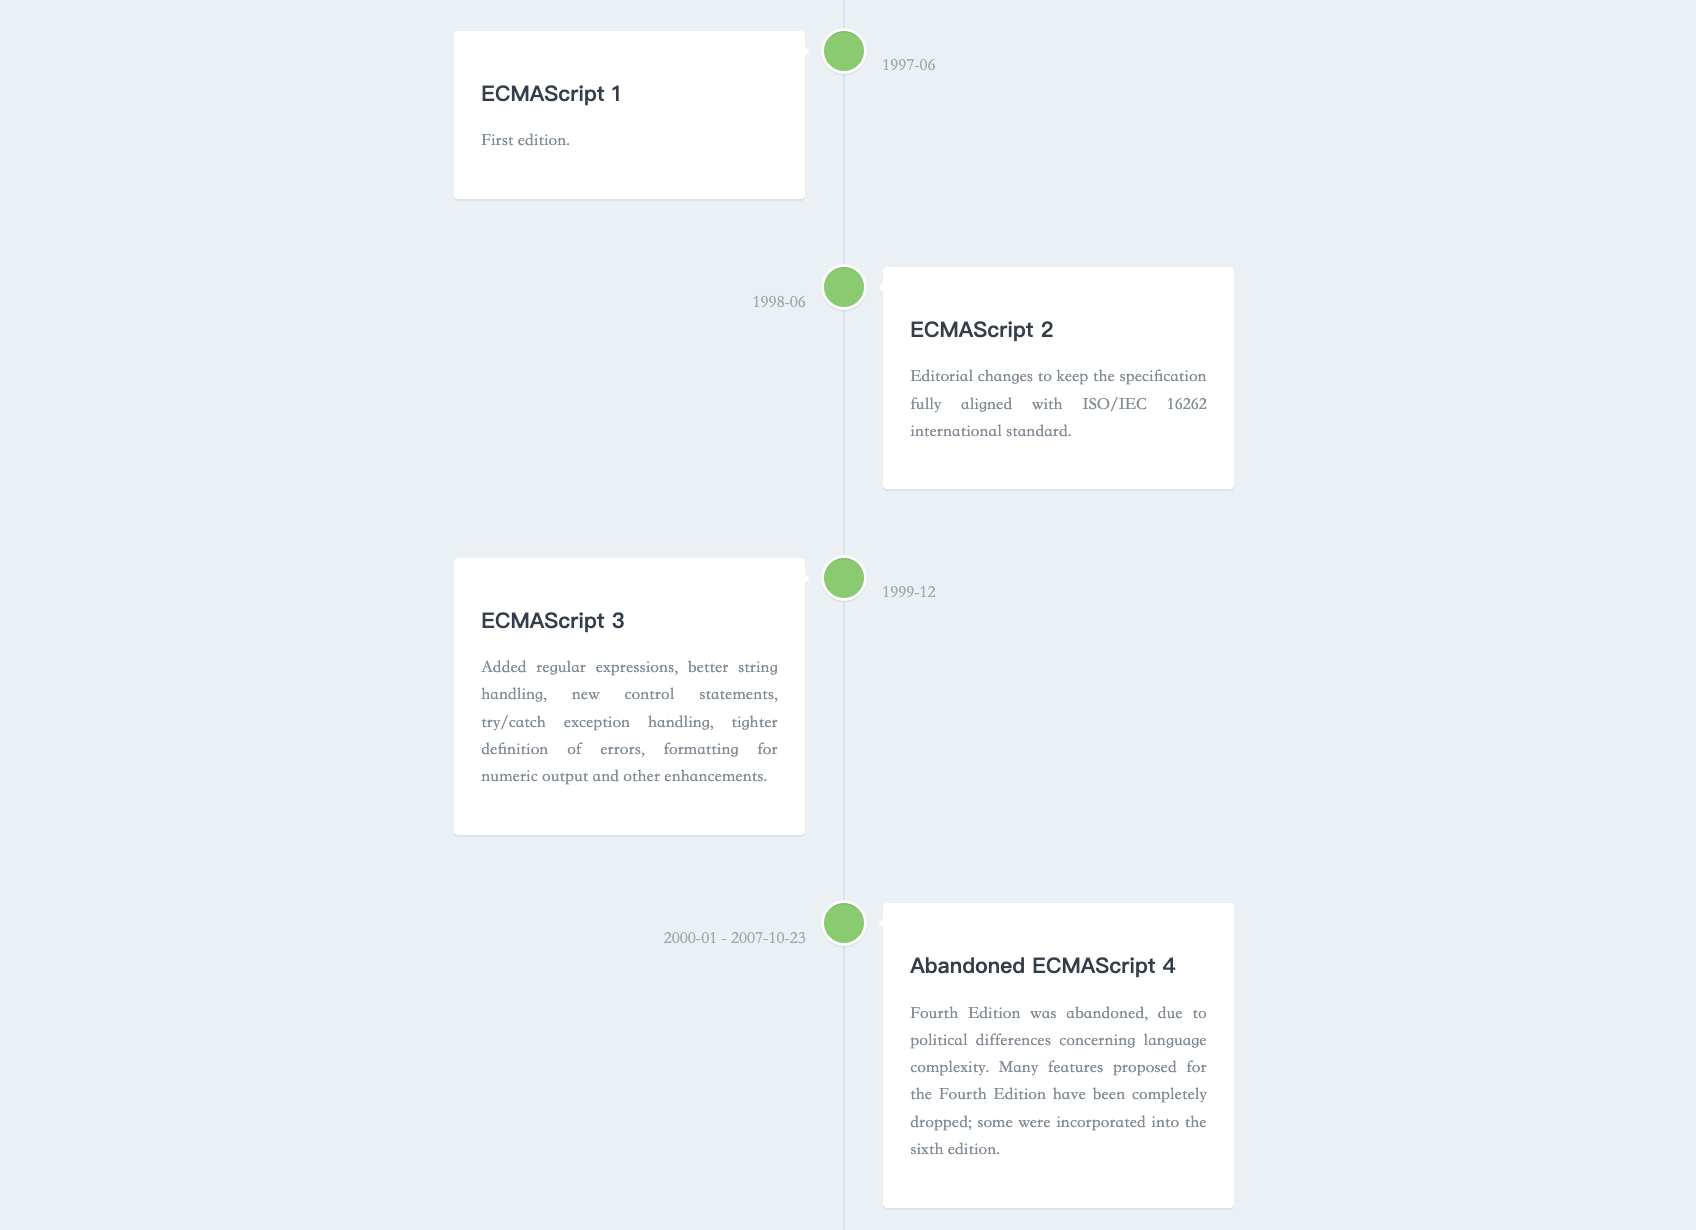
时间线TimeLine

使用WangWei的hexo插件实现:mdline

1
2
3
4
5
6
7
8
9
10
11
12
13
14
15
16
17
{% mdline %}
## 1997-06: ECMAScript 1

First edition.

## 1998-06: ECMAScript 2

Editorial changes to keep the specification fully aligned with ISO/IEC 16262 international standard.

## 1999-12: ECMAScript 3

Added regular expressions, better string handling, new control statements, try/catch exception handling, tighter definition of errors, formatting for numeric output and other enhancements.

## 2000-01--2007-10-23: [Abandoned] ECMAScript 4

Fourth Edition was abandoned, due to political differences concerning language complexity. Many features proposed for the Fourth Edition have been completely dropped; some were incorporated into the sixth edition.
{% endmdline %}

效果如下:

其他

github.io无法访问

1
2
3
4
ip地址1 name.github.io
ip地址2 name.github.io
ip地址3 name.github.io
ip地址4 name.github.io
  • 保存hosts文件(直接修改hosts文件可能会因权限问题无法保存,可以将hosts文件先复制粘贴到桌面,在桌面完成文件修改并保存后,再将hosts文件复制粘贴到原来的文件夹里)
  • (MacOS无需此步骤)刷新DNS:通过Win+R打开“运行”,输入cmd打开命令提示符,输入ipconfig/flushdns,回车即可
  • 即可正常打开github.io网页
  • Windows中,hosts文件的地址一般为:C:\Windows\System32\drivers\etc
  • MacOs中,hosts文件的地址一般为:磁盘\private\etc

参考资料

Thank you for your approval.

欢迎关注我的其它发布渠道